
How to Take Better Night Photos Using Your Smartphone
410 views
You tap the shutter, hold your breath, and wait.
The preview looks promising.
Then you open the photo.
Blurry face. Blown-out streetlights. A strange orange sky. Noise smeared across every shadow.
Annoying, isn't it?
The usual advice—turn on Night Mode and hold the phone steady—isn't wrong. PhoneTrend has already covered those fundamentals, from stabilization and available light to RAW shooting and blue hour. This follow-up goes further: how modern smartphone cameras actually behave after dark, which settings are worth touching, and why the "best" night shot sometimes comes from not using the obvious mode.
Modern phones are remarkably capable. An iPhone 17, for example, combines a 48MP main camera, sensor-shift optical image stabilization, Photonic Engine processing, Deep Fusion, Smart HDR 5, and Night mode. That doesn't mean every dark scene should be photographed at maximum resolution with every automatic feature left alone.
Here's how to get more deliberate results.
Start by understanding what your phone is trying to do
A smartphone rarely takes one simple photograph at night.
Instead, computational photography may capture and combine multiple frames, compare sharp and blurry areas, suppress noise, brighten shadows, and tone down highlights before you ever see the final image.
That's why a one-second Night Mode shot can feel surprisingly slow. And why moving your phone immediately after pressing the shutter can ruin a frame that looked perfectly fine on screen.
Apple's current Night mode documentation is particularly useful here: on supported iPhones, the camera automatically detects low light, selects a capture duration, and lets you extend that duration using the Night mode control. If movement is detected, alignment crosshairs can appear to help stabilize the device.
The shutter button isn't always the end of the exposure.
Treat the few seconds afterward as part of the shot.
Pick the lens before you pick the composition
At night, the lens choice can matter more than the megapixel number printed on the spec sheet.
Your phone's main camera is usually the safest option because it typically has the largest sensor, brightest optics, and strongest computational support. The ultra-wide camera may give you a dramatic view of a city street, but in genuinely dark conditions it can introduce softer edges and more visible noise. A telephoto lens can face the same problem unless the scene is well lit.
Try this instead:
Shoot with the main camera first.
Move physically closer if possible.
Use another lens only when the perspective genuinely improves the photograph.
Don't zoom just because the subject looks far away.
A small change in your position can produce a cleaner image than a heavily cropped or digitally enlarged file.
A practical example: photographing a neon sign
Stand 10 metres away and use digital zoom, and the sign may look bright while everything around it turns into mush.
Walk to 3 metres, use the main camera, tap the sign to focus, then slightly reduce exposure. Suddenly the lettering keeps its detail, the surrounding darkness stays dark, and the image has depth.
Small adjustment. Huge difference.
Stop exposing for the whole scene
Night scenes are usually high-contrast scenes.
Think of a person under a streetlamp, a skyline behind a bright hotel sign, or headlights passing through a dark road. If your camera tries to make everything bright, the highlights often suffer first.
On most phones, tap the area you want to prioritize, then drag the exposure control downward slightly.
Not dramatically. Start with roughly a third to one stop darker if your camera app presents exposure compensation that way.
The result may initially look too dark on the display. That's normal. The goal is to preserve detail in the lamps, signs, windows, and reflections that cannot be recovered once they clip to pure white.
A common mistake is editing later to fix highlights that were already gone.
No slider can reconstruct information that wasn't captured.
Use Night Mode selectively, not religiously
Night Mode is excellent for static scenes. Buildings. Empty streets. Landscapes. A dinner table where nobody is moving.
It becomes trickier with people, pets, cyclists, or traffic.
If your subject moves during a multi-second capture, computational processing may create softness or strange ghosting. Sometimes the answer is to disable or shorten the night exposure and accept a slightly darker frame with cleaner motion.
This is especially noticeable in nightlife photography. Someone dancing under a bar's warm lights might look better with a faster capture than with an aggressively brightened Night Mode image.
Test both.
Take one automatic Night Mode frame, then another with a shorter exposure if your phone allows it. Compare them at full size rather than trusting the tiny preview.
Apple also notes that enabling Live Photos or flash can deactivate Night mode on supported iPhones, which is an easy behavior to miss if you're experimenting quickly in the Camera app.
Stability changes what your phone is capable of
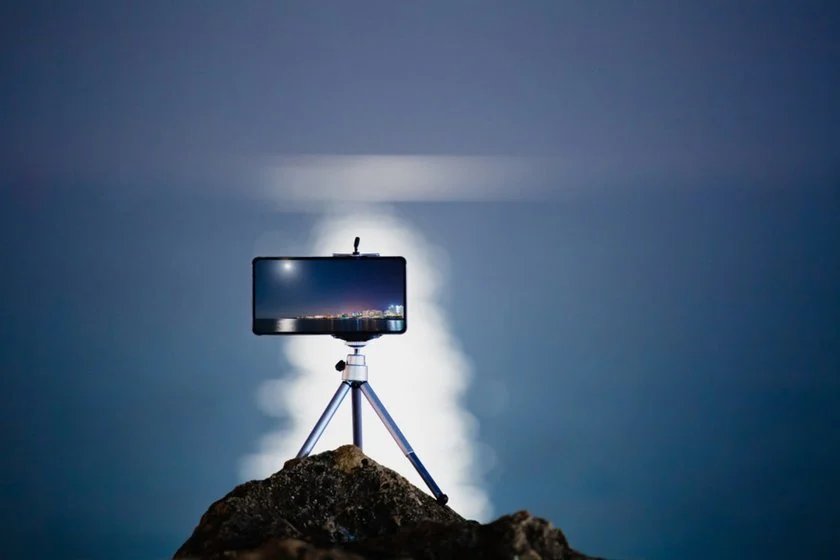
Everybody knows a tripod helps.
The more interesting point is that some smartphones recognize the extra stability and can allow longer captures.
On iPhone, Night mode capture duration depends on conditions, and Apple's documentation recommends placing the phone on a solid surface or using a tripod for greater stability and longer-exposure control.
You don't always need a tripod, though.
I've had better results by putting a phone flat against a backpack, wedging it between two books, or resting it on a low wall than by trying to hold it perfectly still for three seconds. The slightly awkward setup is worth it.
For a completely static scene:
Set a 2- or 3-second timer.
Brace the phone against something solid.
Avoid touching the device during capture.
That's enough to eliminate a surprising amount of blur.
Manual mode: change one variable at a time
Pro mode can be useful. It can also produce terrible photos very quickly.
The temptation is to crank ISO, slow the shutter, tweak white balance, and assume "manual" automatically means "professional."
It doesn't.
Start with shutter speed.
For handheld scenes
Try to keep the shutter reasonably fast for your subject and your ability to hold the phone steady. A stationary building may tolerate a slower capture; a person talking almost certainly won't.
For tripod shots
You can use longer exposures, lower ISO, and let stability do the work.
Higher ISO brightens the image, but it also gives the image-processing pipeline more noise to manage. On many phones, that can lead to the familiar waxy look where fine textures disappear after noise reduction.
The better workflow is usually:
More stable camera → longer usable exposure → lower ISO → cleaner detail.
Simple physics still wins.
RAW is useful—but only for difficult scenes
RAW isn't a magic "make photo better" switch.
A RAW or computational RAW file is most useful when the scene contains tricky highlights, unusual color casts, or deep shadows you plan to edit carefully. Apple ProRAW and Samsung's Expert RAW are examples of workflows aimed at giving photographers more editing flexibility, though availability varies by model and mode.
For a quick photo of friends outside a restaurant, a processed JPEG or HEIF may actually look better straight away.
For a cityscape with bright signage and deep shadows? RAW becomes more interesting.
The trade-off is storage. These files can be substantially larger than standard phone photos, so a long night of experimenting can consume space faster than expected.
Shoot RAW with a reason.
Not out of habit.
White balance is where many night photos quietly fall apart
Streetlights are messy.
Older sodium lighting can push scenes toward orange. LEDs can introduce cooler or greener tones. Mixed lighting is worse: imagine warm café windows, blue signage, and white headlights in the same frame.
Auto white balance sometimes handles this beautifully.
Sometimes it doesn't.
If you're using a manual or Pro mode, try a fixed white balance rather than letting the phone change color interpretation between frames. Then adjust during editing if needed.
In Lightroom Mobile, for example, start by correcting temperature and tint before touching texture, sharpening, or saturation.
Otherwise you're polishing the wrong problem.
Don't erase the atmosphere
A warm street should sometimes stay warm.
The goal isn't always neutral white. If a scene looked amber because of the lamps around you, removing every trace of that color can make the finished photo technically accurate and emotionally flat.
Night photography benefits from restraint.
Try computational tricks your phone already supports
The biggest jump in quality may come from using a feature built into your device rather than downloading another camera app.
Google's Night Sight, for example, became notable for multi-frame low-light capture and astrophotography. NASA's smartphone astrophotography guide describes how Pixel 4 could combine sixteen 15-second exposures into a four-minute-equivalent capture for its astrophotography workflow, while earlier Pixel models used shorter total capture sequences.
That's a useful reminder: astrophotography on a phone isn't simply about opening the shutter for an extremely long single exposure.
It's often about stacking.
The same principle applies to ordinary Night Mode photography. Your phone may be doing substantial computational work behind the scenes, so give it the conditions it needs: darkness where appropriate, minimal vibration, and a subject that isn't constantly changing.
A better workflow for three common night scenes
City streets
Expose for the brightest meaningful light source, then let the shadows remain somewhat dark. Look for reflections in windows, puddles, polished pavement, or even car bodywork.
Avoid making the entire scene evenly bright. Night should still look like night.
Portraits
Move your subject toward soft, directional light rather than placing them directly beneath the harshest streetlamp available.
A shop window can work beautifully. So can the edge of a neon sign.
Ask the person to hold still for a moment. That tiny bit of cooperation matters more than another round of editing later.
Stars
Get away from city lights if possible. Stabilize the phone completely. Disable anything that introduces vibration, and give an astrophotography or Night Sight mode time to finish if your device supports it.
On iPhone, a stable setup can enable longer Night mode captures, while Apple's official guidance specifically recommends a tripod or secure surface for improved stability.
Don't expect every phone to reveal the Milky Way from a brightly lit city centre.
Physics is still involved. Sadly.
Edit the file without sanding away every detail
Night photos can look fantastic after modest editing.
They can also turn into crunchy, radioactive-looking disasters.
My usual order is:
Correct exposure and highlights.
Adjust white balance.
Lift shadows only as much as necessary.
Apply noise reduction carefully.
Add sharpening last—and lightly.
Zoom in before judging noise reduction. If brick walls, skin, leaves, or fabric start looking like smooth plastic, back off.
The same goes for saturation. Neon is already loud. It rarely needs much help.
FAQ: Smartphone Night Photography
Why are my night photos blurry even with Night Mode?
The problem is often movement during the multi-frame capture. Stabilize the phone and remember that your subject must stay relatively still too. For moving people or vehicles, a shorter exposure can produce a sharper result.
Should I use the 48MP or 50MP mode at night?
Usually, test the main camera's default automatic mode first. Full-resolution modes can involve different processing or capture requirements, and the best low-light result isn't automatically the file with the largest pixel count.
Why does my phone make night photos look brighter than the real scene?
Computational photography is designed to reveal shadow detail and produce a usable exposure. Reduce exposure slightly before capture or darken highlights and blacks during editing if you want a more natural night-time mood.
Is a cheap tripod actually worth buying?
For static scenes, absolutely. Even basic support can reduce shake and may allow your phone to use longer Night Mode capture times. A stable wall or solid surface works too.
Can I photograph stars without a special camera app?
Yes, if your phone includes a dedicated astrophotography or advanced night mode. Results depend heavily on the model, available light pollution, stability, and weather conditions. Google's Pixel astrophotography approach and Apple's tripod-assisted Night mode show how much modern phones can accomplish with computational processing and a stable camera.
The next time you're outside after dark, don't just point your phone at the scene and hope the algorithm sorts it out. Take two minutes. Choose the strongest lens, find the brightest part you don't want to blow out, stabilize the phone, and shoot a second version with a different exposure.
Then compare them.
That habit—making deliberate alternatives instead of trusting a single automatic frame—is where noticeably better night photography starts.
night photography phone
low light camera tips
smartphone night mode
mobile photography tutorial
phone camera settings
Found this helpful? Share it!